Quickstart
Get Polyclaw running in under five minutes using the TUI.
1. Clone the Repository
git clone https://github.com/aymenfurter/polyclaw.git
cd polyclaw
2. Install Bun
The TUI runs on Bun. If you do not have it installed:
curl -fsSL https://bun.sh/install | bash
3. Install Docker
The TUI builds and runs Polyclaw inside a Docker container. Make sure Docker is installed and the daemon is running:
docker --version
If you do not have Docker, install Docker Desktop or use your system package manager.
4. Launch the TUI
./scripts/run-tui.sh
The script installs TUI dependencies automatically on first run, then launches the interactive interface.
5. Accept the Disclaimer
On first launch, a risk disclaimer is shown. Read it carefully and type accept to continue. This only appears once – the acceptance is persisted to disk.
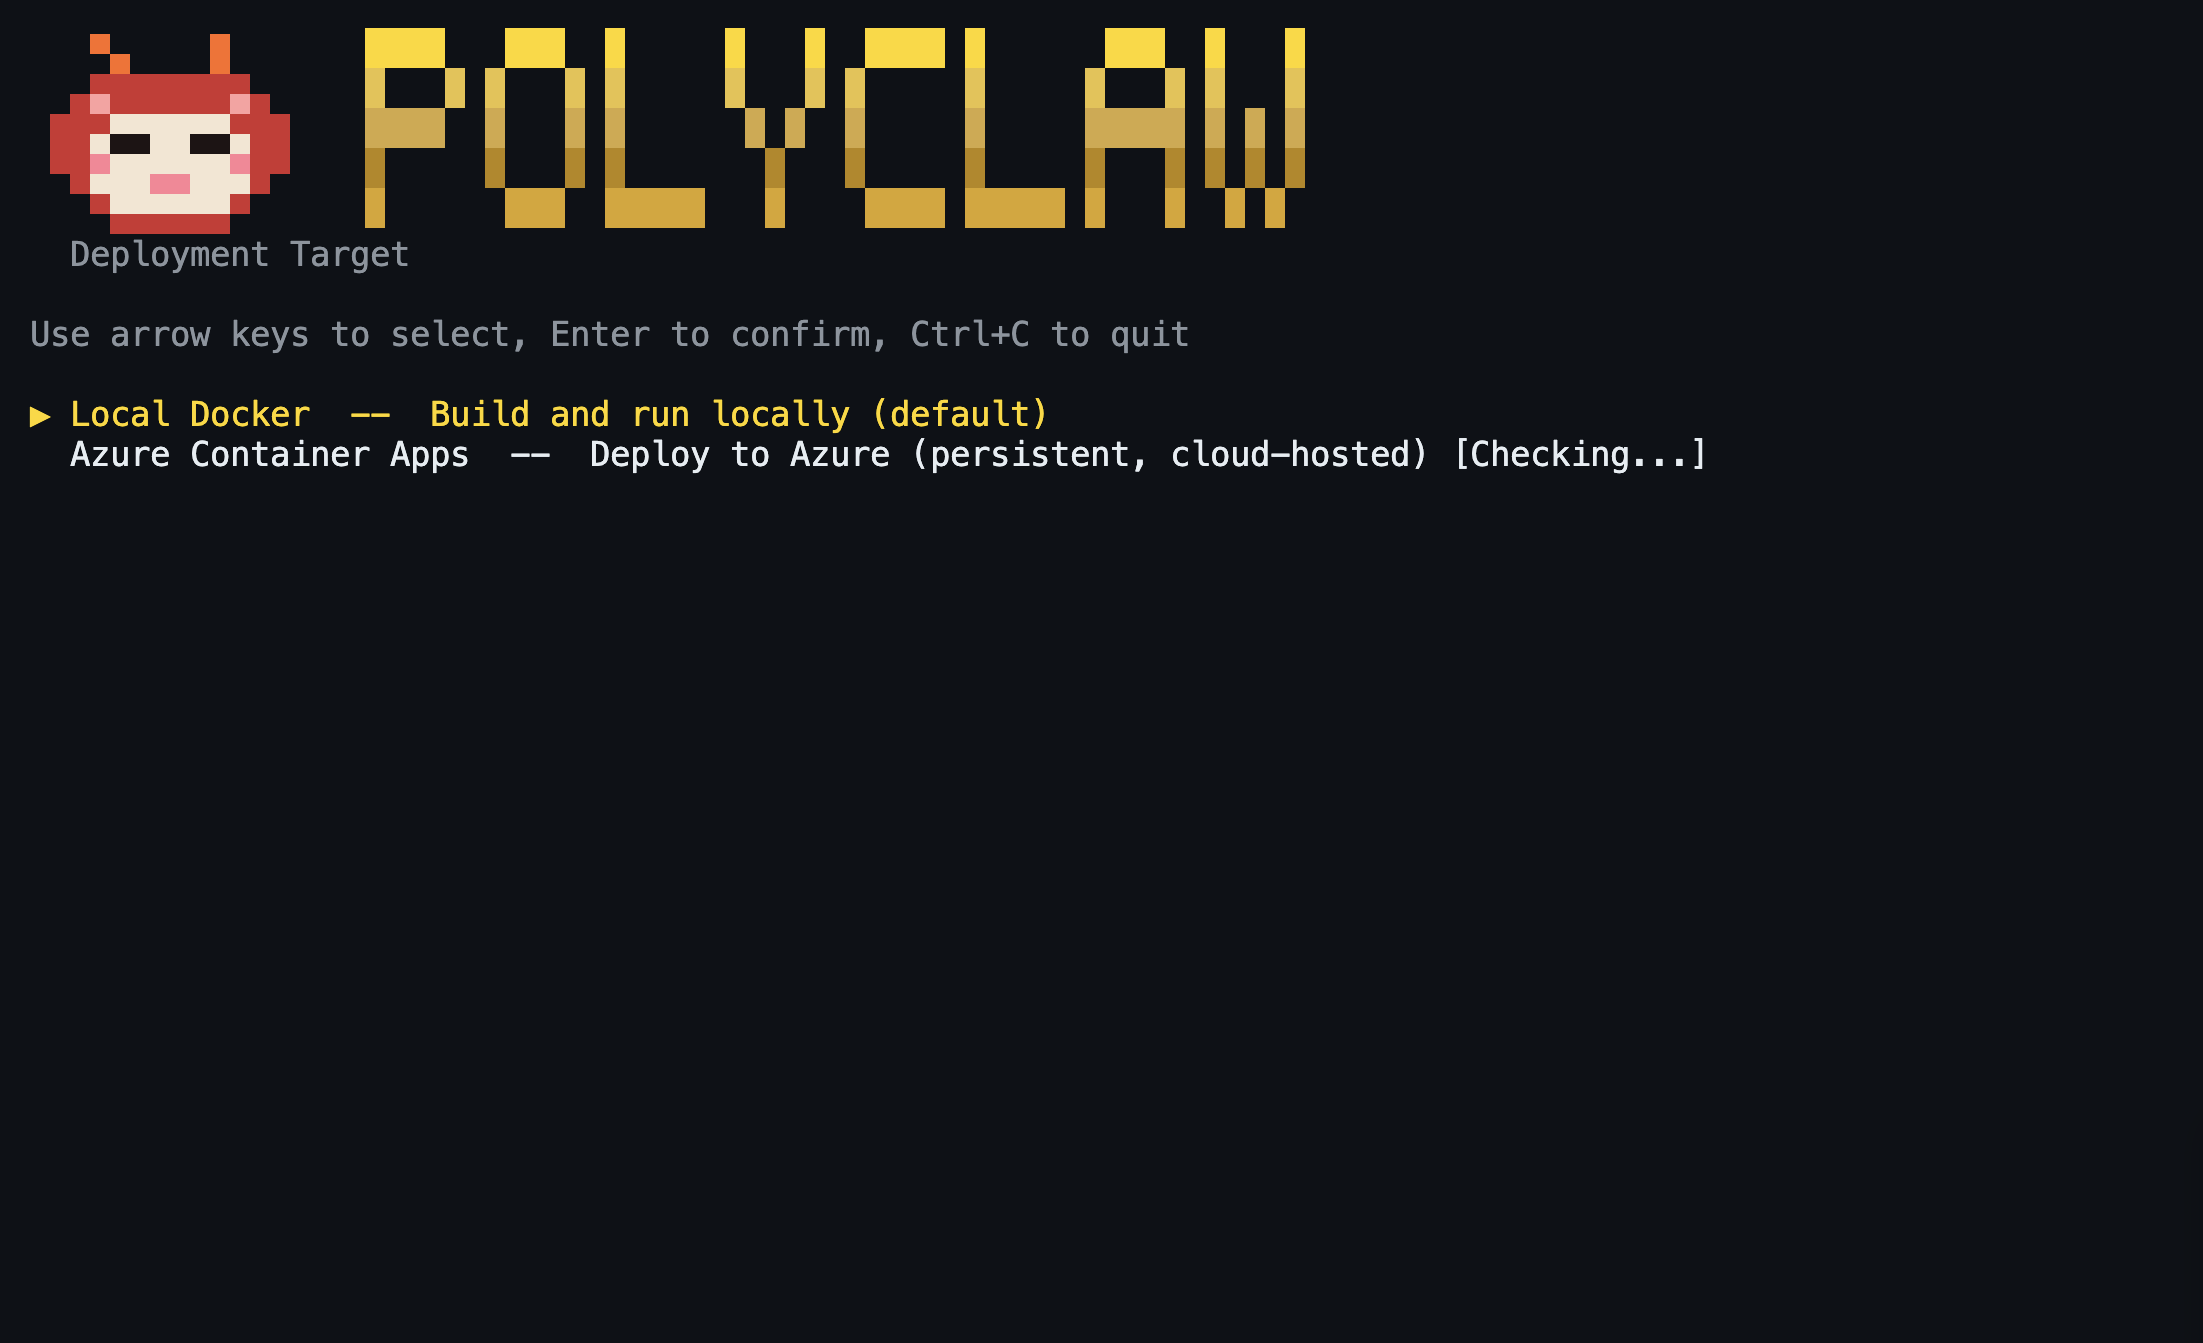
6. Choose a Deployment Target
The target picker presents two options:
Local Docker – Builds the image locally and runs the admin and agent runtime containers. The containers stop when you exit the TUI. This is the recommended starting point and requires only Docker.
Azure Container Apps – Deploys the agent runtime to Azure while the admin container continues to run locally. This option is only available once you have a fully configured local environment (identity, channels, secrets). It reuses the local admin container and pushes only the agent runtime to ACA. Requires the Azure CLI (az) with an active login. If az is not installed or you are not logged in, this option is greyed out.
The remote agent runtime deployment model is experimental and will be overhauled in a future release. Use Local Docker for initial setup and evaluation.
Use the arrow keys to select a target and press Enter.
7. Wait for Build and Deploy
The TUI streams build output in real time. For Local Docker, this builds the image and starts the container. For ACA, it additionally pushes to Azure Container Registry and provisions the Container App.
Once the server passes its health check, you are dropped into the TUI dashboard with:
- Live container logs
- Interactive chat with the agent
- Plugin and skill management
- Scheduler controls
- Session browser
The following services are deployed automatically during this step:
- Cloudflare tunnel – public endpoint for webhooks, no manual setup required
- Playwright browser – headless browser for web-based skills
- Bot Service – Bot Framework registration for Telegram and other channels
All other integrations (Foundry BYOK, voice via ACS, Key Vault secrets, additional MCP servers) are optional and can be configured later through the Setup Wizard or Configuration.
To deploy Azure AI Services infrastructure (Foundry, Key Vault, Content Safety, etc.) use the Deploy Infrastructure button in the Setup Wizard or Bicep deployment. See Bicep Infrastructure for details.
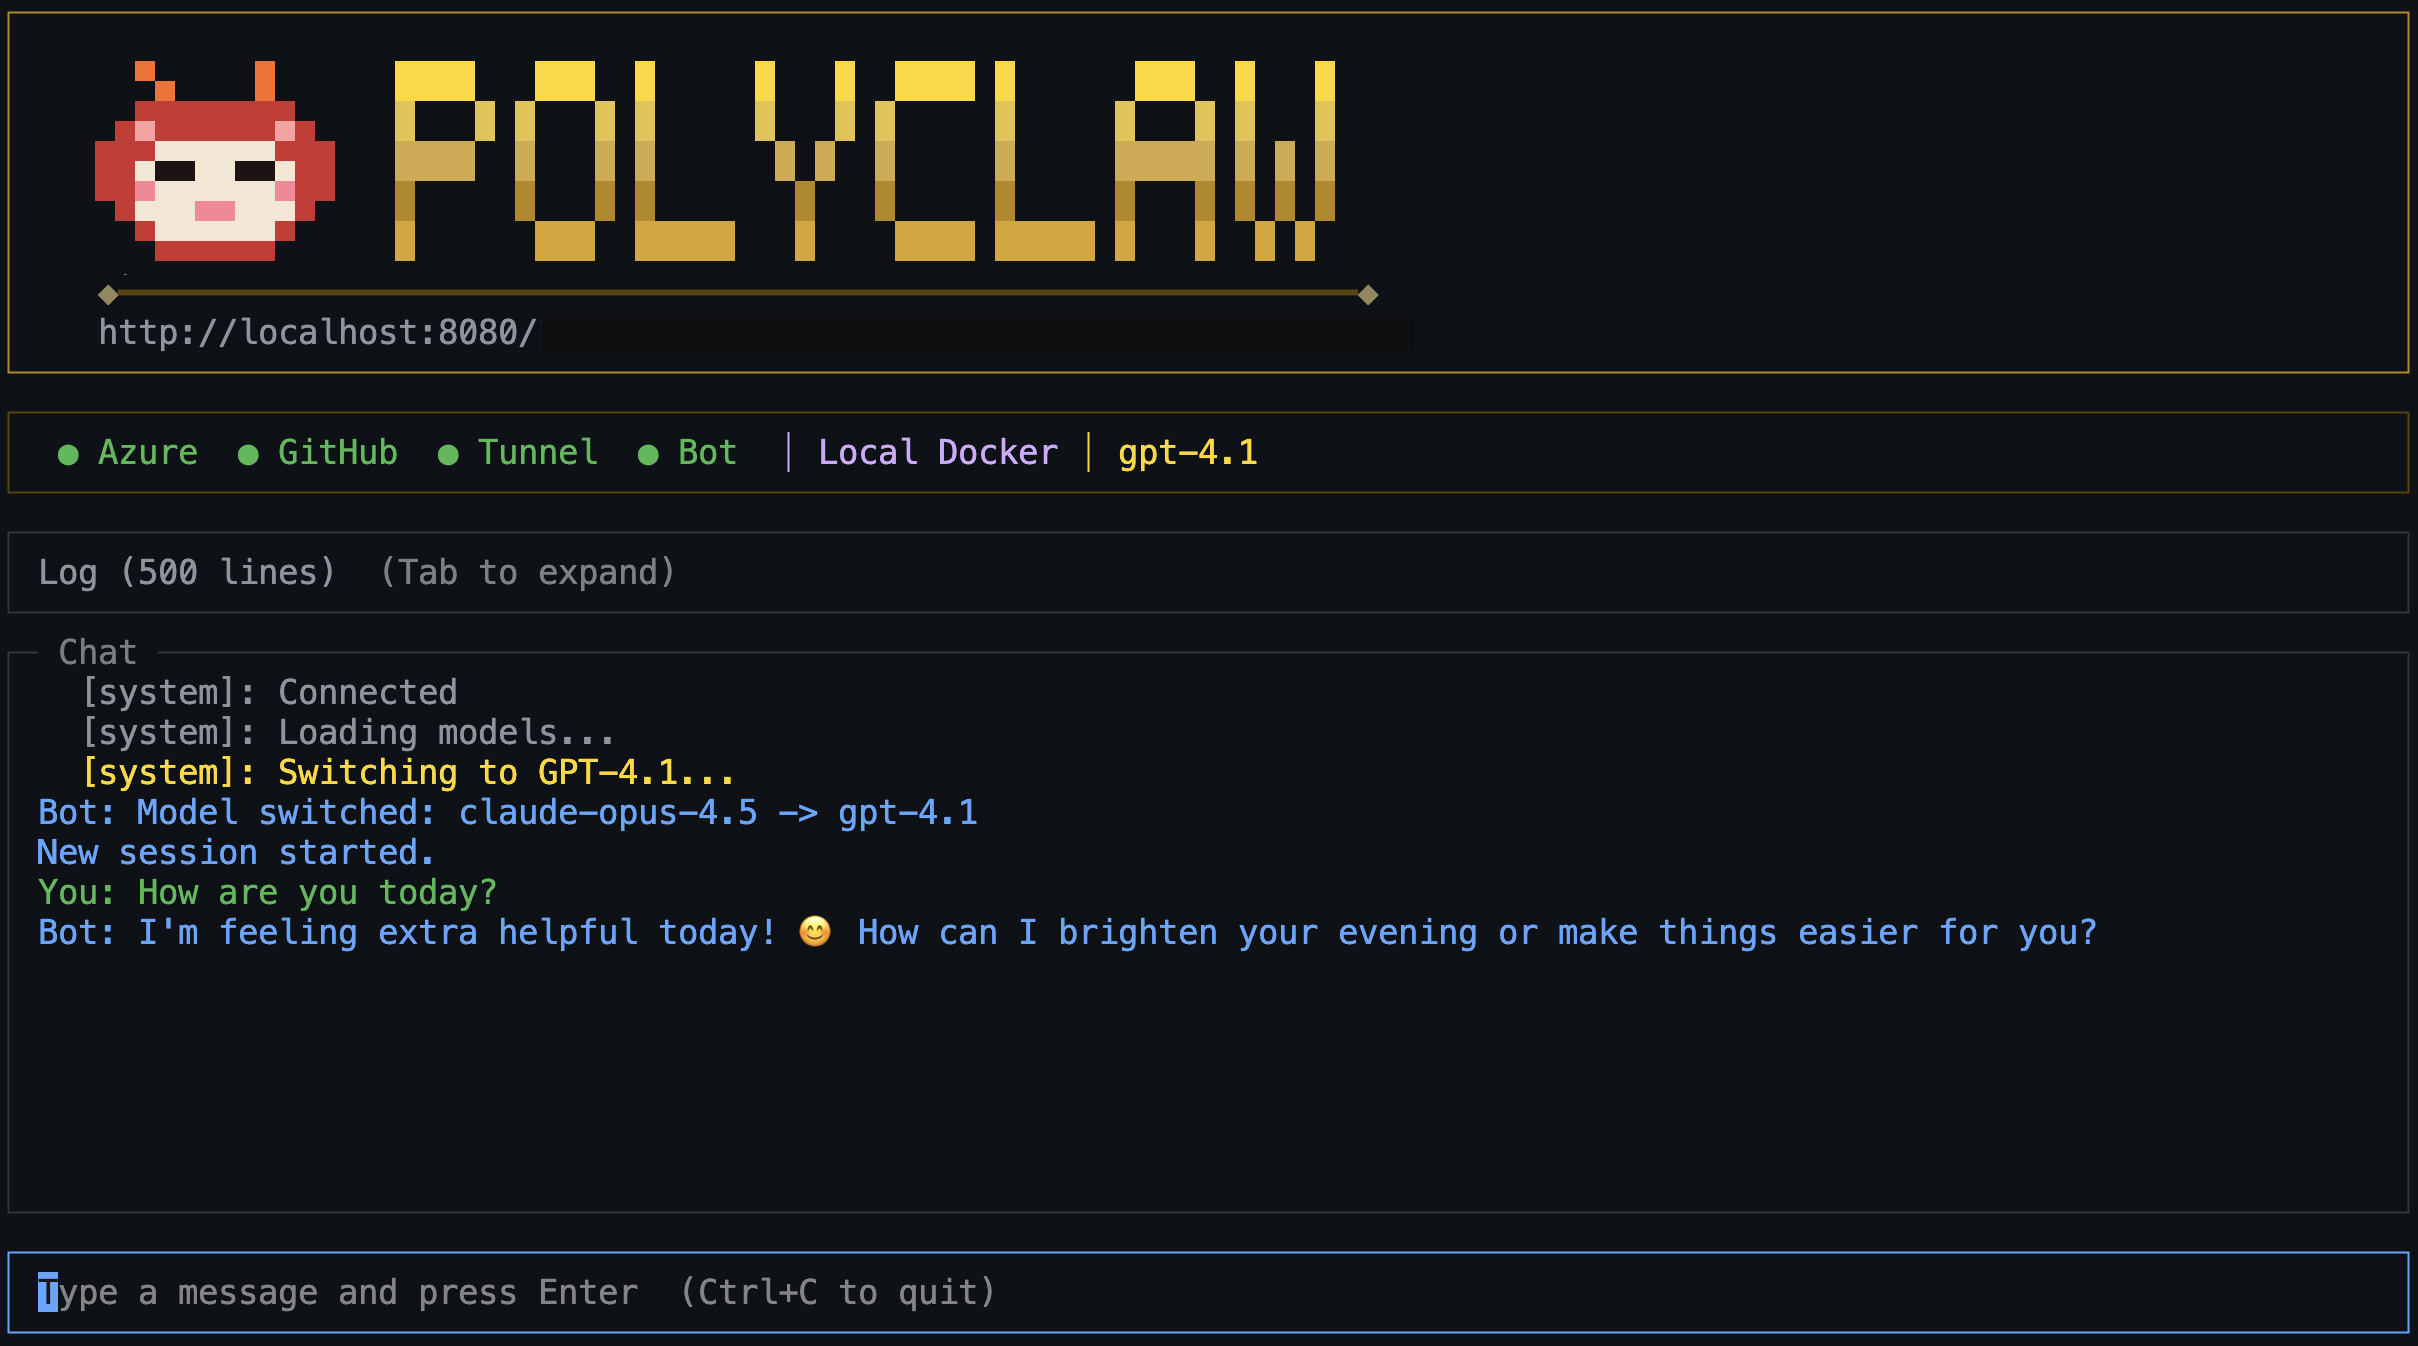
8. Open the Web Dashboard
The admin web dashboard is available at the URL shown in the TUI (typically http://localhost:9090 for local, or the ACA FQDN for Azure). The admin secret is displayed in the TUI output.
9. Configure Guardrails
After deployment, configure guardrails through the web dashboard under the Guardrails settings page. As a starting point:
- Enable Azure AI Content Safety (Prompt Shields) to detect prompt injection attacks.
- Start with the permissive preset and tighten policies incrementally as you observe the agent’s behavior and understand which tools need stricter controls.
- Adjust per-model autonomy levels based on your risk appetite.
See Guardrails & HITL for full configuration details.
Next Steps
- Prerequisites – full dependency reference
- Setup Wizard – identity and channel configuration
- Configuration – environment variable reference